Showing posts with label baking. Show all posts

05/06/2017

Unicorn Cupcakes

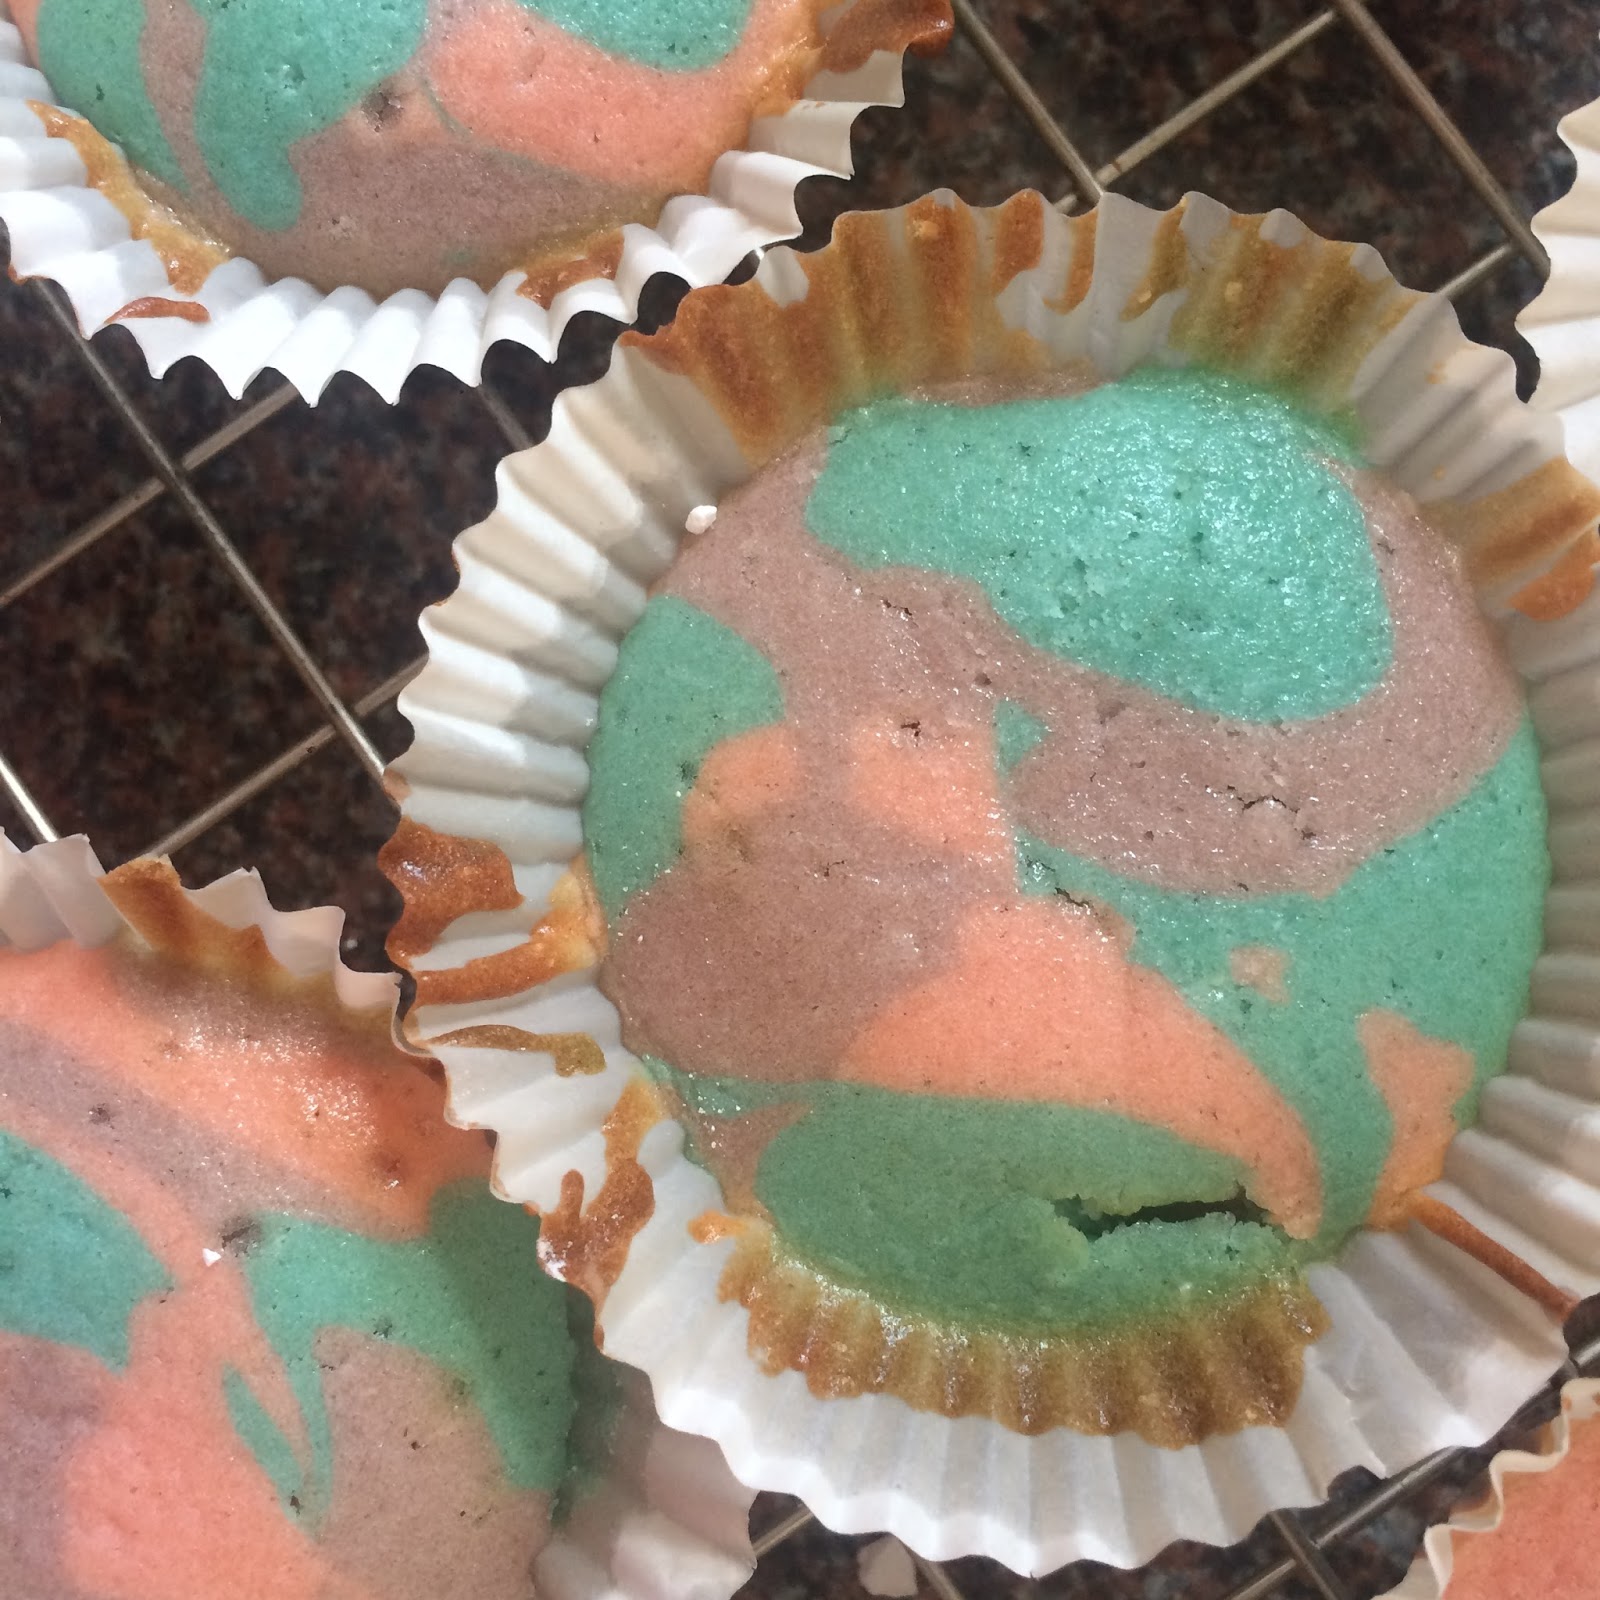
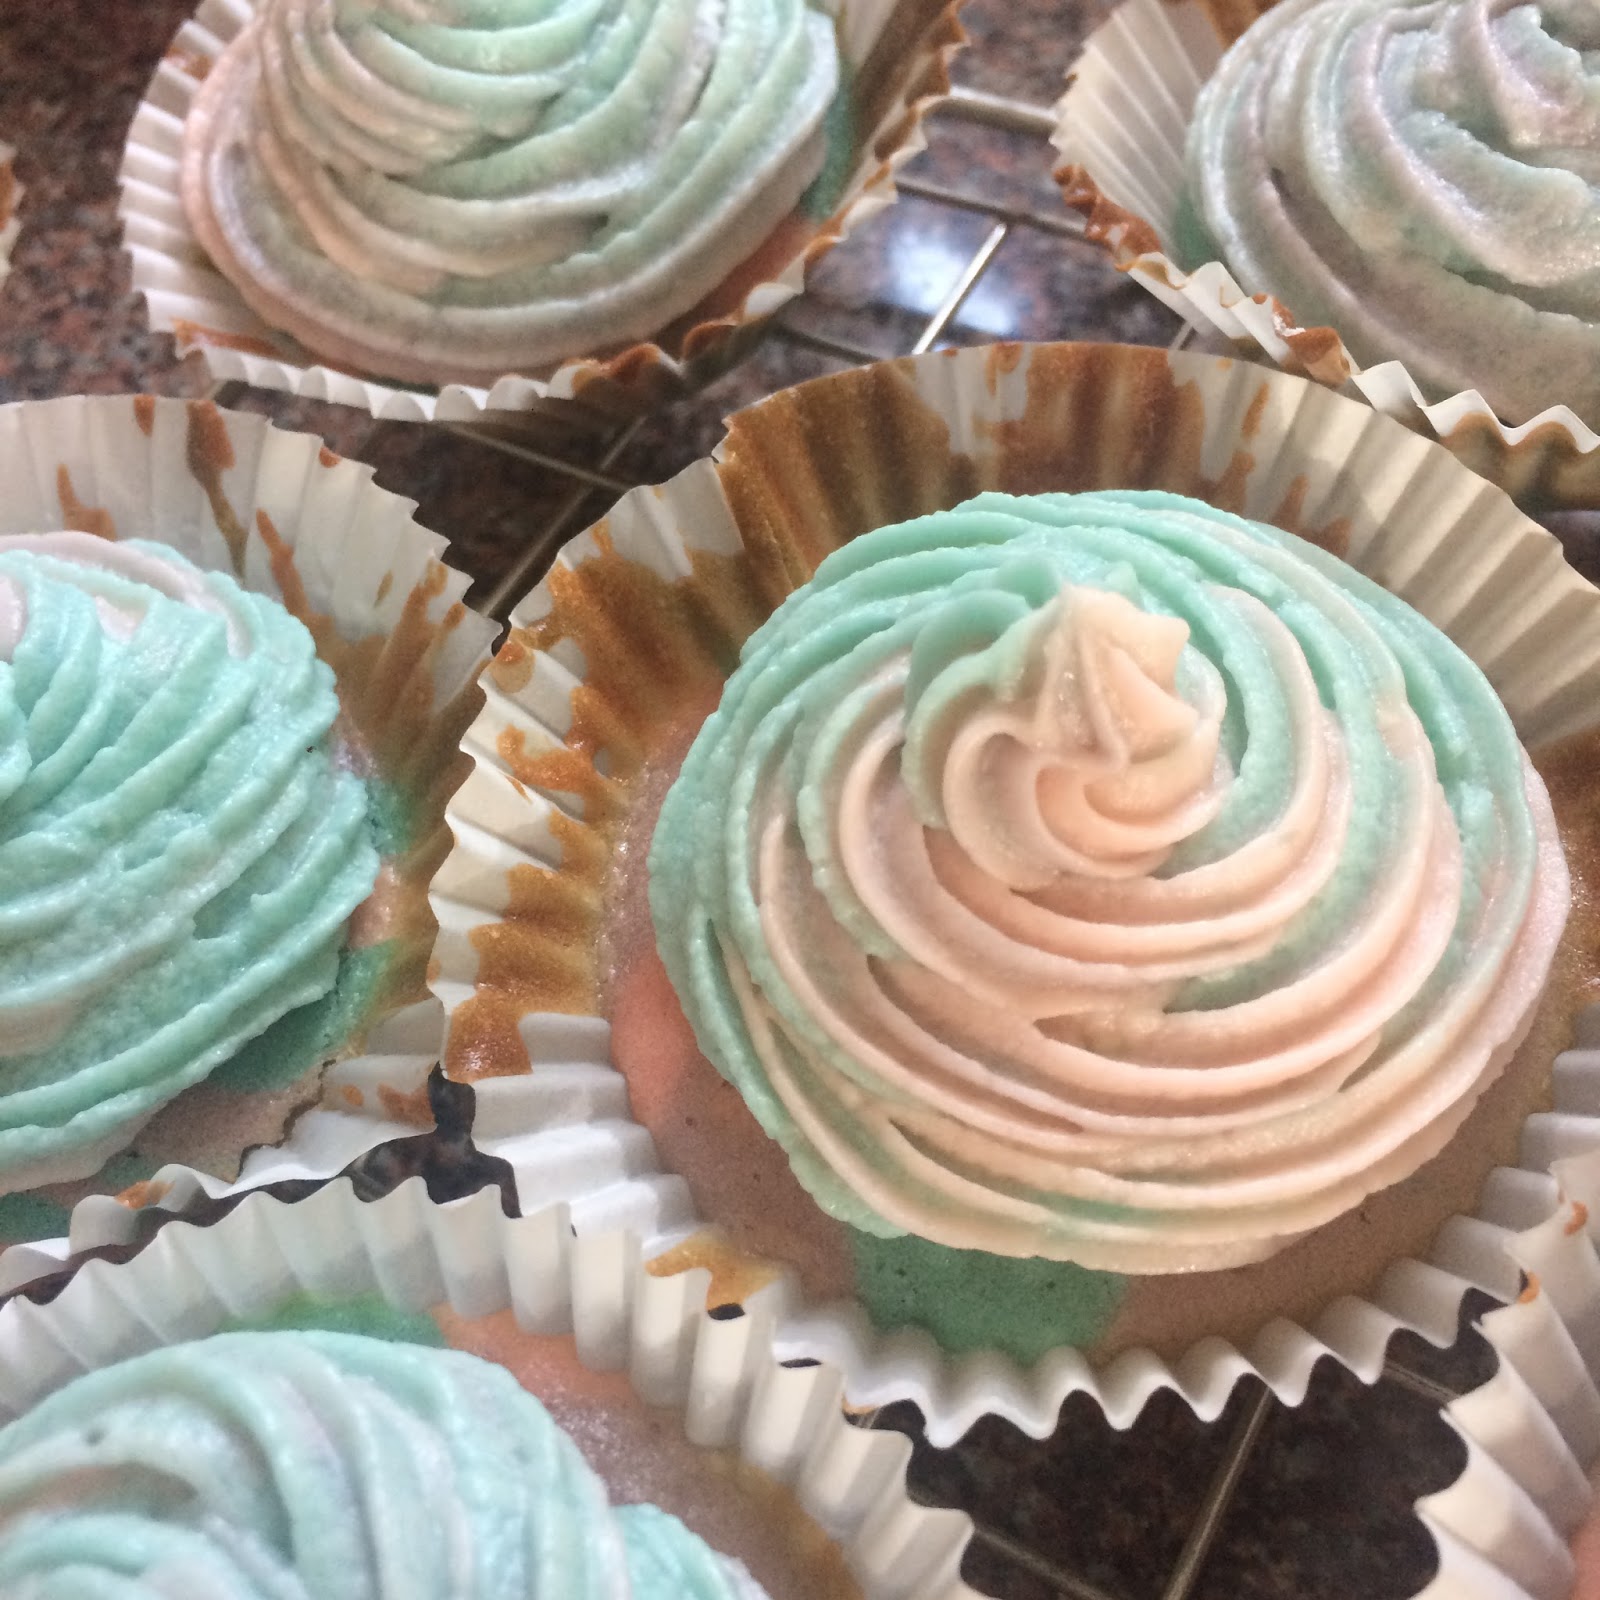
I found this Unicorn Cupcake recipe back in March and I've had my eye on it since then. The outcome of the cupcakes looked really cool and quirky and they were definitely something I wanted to try. 

I would say you need at least two people to make these cakes - I did it by myself and I end up with cake mixture and colouring absolutely everywhere, so at least two people would probably make it a lot easier. 

Ingredients:

Cupcakes:

430g of Plain Flour
3 teaspoons of Baking Powder
265g of Caster Sugar
1/2 teaspoon of Salt
125g of Unsalted Butter, softened
375ml of Milk
2 tablespoons of Greek Yoghurt (or use Sour Cream instead)
125ml of Vegetable/Olive Oil
1 teaspoon of Vanilla Extract
2 Large Eggs
4 drops of Pink food Gel
2 drops of Blue food Gel
2 drops of Purple food Gel

Icing:

200g of Icing Sugar
100g of Unsalted Butter
1 teaspoon of Vanilla Extract
1 tablespoon of Milk or Water
2 drops of Pink food Gel
2 drops of Blue food Gel
1 drops of Purple food Gel


Method:

Cupcakes:

1) Pre-heat the oven to 180C (356F) or 160C (320F) for a fan oven. Line a cupcake tin with cupcake liners
2) In a bowl, add the flour, baking powder, caster sugar and salt. Use an electric whisk and whisk the mixture together for a few minutes of until all the ingredients are combined. Alternatively - if you don't have an electric whisk, try sifting the ingredients together to ensure their are no lumps. 
3) Add the unsalted butter, softened butter and mix the ingredients again until it resembles a very fine, sand like, texture.
4) After this, measure out the milk, yoghurt, oil and vanilla extract into a separate jug or bowl and whisk well until the ingredients are fully combined.
5) Next, slowly add the wet ingredients to the dry ingredients in a steady fashion, whilst whisking the mixture, until you've completely combined the two mixtures. 
6) Split the batter equally between the three bowls. Then, colour one with 2 drops of blue gel, one with 2 drops of pink gel and the last one with 2 drops of pink and 2 drops of purple (or use as much gel as it takes to colour your mixtures). 
7) Transfer the batter in 3 separate piping bags and carefully pipe little blobs of each colour in the cupcake liners. Make sure you alternate which colours you use in order to create un-ordered but colourful cupcakes. For example, pipe a blob of pink, then blue, then purple and repeat until you've filled the cupcake liner 3/4 of the way. 
8) Bake the cupcakes for 20 to 25 minutes or until a toothpick or knife inserted into the centre of a cake, comes out clean. Transfer the cakes to a wire rack and allow them to cool.

Icing:
1) To prepare your icing whisk your unsalted butter until it is fluffy and completely softened.
2) Next, add your icing sugar and whisk the mixture until the butter and icing sugar are completely combined and you have a fluffy mixture.
3) Add the vanilla extract and milk/water, to softened down the mixture - you can always add more if need be, but ensure your icing retains 'peaks' (points). 
4) To add colour to your icing, use the same method as your cupcake mixture. Separate the icing into three bowls then add 2 drops of blue to one bowl, 2 drops of pink to another and 2 drops of purple and 2 drops of pink to the last (or use as much gel as it takes to colour your mixtures). 
5) Then transfer the mixture into ONE piping bag - trying to ensure the colours stay separated as much as possible.
6) The last part - of how you actually ice your cupcakes - is up to you. You can either:

  • Frost three blobs of frosting onto the cupcake. The bottom of being the biggest and top one being smaller. And then pipe little blobs around each blob - finishing with one final blob on top OR
  • You can use a star shaped piping head and ice the cupcakes in a spiral movement - for a simpler but still effective look. 
I used the second icing technique - just because I felt the first would create more icing than their was cupcake. I hope you enjoy these cupcakes if you make them! They're quite a lot of work, but totally worth it. 

"Be the baddest unicorn in the whole freakin' galaxy"

Until next time,

Alice x 

Continue Reading...

17/04/2017

Salted Caramel Cupcakes

I've made these Salted Caramel Cupcakes twice now; the basic cupcake recipe is super easy to follow, however filling and icing the cupcakes is a bit more complicated and time consuming (however SO worth the yummy cupcakes you end up with), so if you decide to make these cakes make sure you have enough time and perhaps a bit of help to help you prepare the icing and the salted caramel.

The first time I made these cupcakes, me and Meg wanted to film a video and needed a recipe to do so, we found a salted caramel cupcake recipe online but we wanted to put our own twist on the cakes, so we decided to fill the cupcakes with salted caramel as well as creating our own icing to compliment them. If you'd like to check the video out, you can do so here.

The second time I made these cupcakes I had a bit of help from my mum; I attempted to make them by myself, however, honestly, a little bit of help goes a long way, and having someone to cut out the centres of the cakes and ensure the icing and salted caramel is the right consistency for being piped means you have a little less to do.

Ingredients:

Cupcakes:
210g Plain Flour
1 3/4 Teaspoon Baking Powder
200g Caster Sugar
2 Medium eggs, beaten
170ml Milk
1 Teaspoon Vanilla Extract
112g Butter/Margarine
Salted Caramel Sauce (or anything similar)

Icing:
200g Icing Sugar
100g Unsalted Butter
1 Teaspoon Vanilla Extract
1 Tablespoon Milk
Salted Caramel Sauce (or anything similar)

Method:

1) Preheat the Oven to 175/180 degrees Celsius. Line a cupcake try with 12 paper liners (you can always add more if you have additional cupcake batter).
2) Using a mixing bowl, cream together the sugar and margarine until they're fully combined.
3) Beat the eggs together in a jug and add in the vanilla extract. Gradually whisk the eggs into the sugar and margarine mixture, adding a little at a time and beating well after each addition.
4) Using a separate bowl combine the flour and baking powder. Then carefully fold in the flour mixture alternating with the milk, in several additions.
5) Half-fill the paper cases with the batter and bake them for 20 to 25 minutes (or until a toothpick comes out clean when inserted into the centre of a cupcake)
6) Once cooked transfer the cupcakes to a wire rack to cool.

Filling

1) Once the cupcakes have cooled cut out the centre of the cakes. Make the hole circular and about half way down the cupcake (a small to medium size).
2) Once the centre of the cakes have been removed start piping the salted caramel into the centre of each of them.
3) Replace the centres of the cakes as you go. Cut off the bottom of the centres only leaving the top part remaining - do this so the salted caramel doesn't overflow out of the middle of the cake.

Icing

1) Weigh and combine the icing sugar and the unsalted butter together by whisking the mixture together.
2) Add in the vanilla extract and milk and stir them into the mixture. The icing should be light and fluffy and should drop off a spoon without any force, but not run off a spoon otherwise it is too runny. 3) If you want to add some colouring into your icing you can do so now. To only colour part of your icing remove a small section and place it into a separate bowl. Then add in a drop of your chosen colour.
3) Put the icing into your piping tube and pipe it in a circular motion onto the top of each cupcake. If you have coloured icing too try to place it directly next to your white icing in the actual piping tube.
4) Once you have iced all of your cupcakes return to your salted caramel piping tube and follow the lines of your icing to ensure your salted caramel follows the structure of your icing.
5) Then ENJOY!  

"You can't be sad when you're holding a cupcake"

Until Next Time,

Alice x
Continue Reading...

20/04/2016

Q - Quick and Easy Mug cake


Previously I've struggled to make mug cakes, there's something about putting together the quick and easy mixture and then cooking it in the microwave - I can't seem to knack. However, this recipe I found on NetMums as an easy 10 minute recipe, to make a delicious dessert - made sure I couldn't mess it up, and I finally made my first successful Mug Cake.

Microwave Mug Cake:

This recipe makes 1 mug cake in a large cup or two smaller mug cakes in small-standard mugs. I only made the cake in one standard mug, thinking the fact the mixture only covered half the mug would give it enough rising room, however, the cake still overflowed the mug, so although it may not look like very much, you only need a small amount of mixture. 

Ingredients:

4 tbsp of Self-Raising Flour
4 tbsp of Caster Sugar
2 tbsp of Cocoa Powder
1 Egg
3 tbsp of Milk
2 tbsp of Chocolate Chips (Optional - but I would advise putting them in otherwise the cake is a bit dry)  

Method:

1) Use a medium sized bowl and after you've created the mixture tip the mixture into one large mug or divide it into two smaller mugs.
2) Measure out the flour, sugar and cocoa powder into the bowl and mix them together to combine them.
3) Add the egg and mix it in - trying to make sure the egg covers most of the dry mixture
4) Add in the milk and mix until it's smooth with no visible lumps
5) Add in your chocolate chips (if you're including them) and mix until they're combined into the mixture completely.
6) Centre your mug in the middle of the microwave and cook for 2-4 minutes - depending on how powerful your microwave is - or until it is firm to the touch.
7) Allow the mug cake to cool and serve
8) Enjoy!

If you don't like chocolate cake, try removing the cocoa powder and adding in 2 extra tbsps of self raising flour instead. Also try adding in a spoonful of peanut butter, chopped nuts, jam, raisins - all could be quite nice to try in your mug cake.

"Good food is very often, even most often, simple food"

Until Tomorrow,

Alice x


Continue Reading...

06/04/2016

E - Extremely Healthy Brownies


My mum started slimming world a couple of months ago and so she's been trying to find healthier ways of eating the same (or similar) foods. Recently, she found a recipe on Pinterest of Slimming World Brownies that have less fat in as they don't include simple ingredients such as flour and sugar, and instead the only ingredient that really has any calories in is cocoa powder, this makes the texture slightly different to your usual brownie however they are still super tasty.

Slimming World ½ Syn Chocolate Brownies:

This recipe should take around 40 minutes all together, including prep time and cooking time, and should make around 25 small brownies - but you only want to eat a small amount of them at a time anyway as they're quite rich and filling.

Ingredients:

6 Eggs (Separated)
70g Splenda (or other sweetener)
60g Cocoa Powder (not Hot Chocolate)
1tsp Vanilla Essence
Fry Light

Method:

1) Preheat the oven to 180 degrees
2) Spray the baking tin with Fry Light and line it with greaseproof paper
3) Whisk the egg whites until they form soft peaks.
4) In a separate bowl to the egg whites, add the egg yolks, sweetener, vanilla essence and cocoa powder
5) Whisk the mixture until it's fully mixed (You can add a bit of water if the mixture is too stiff)
6) After that, fold in the egg whites
7) Pour the mixture into the baking tin
8) Bake the brownies for 25-30 minutes and cut into approximately 2
5 brownies

You can enjoy the brownies hot or cold, however we preferred the brownies when they had cooled down as we found the less rich and more tasty!

"You don't have to eat bad food to eat healthy food"

You can find the original recipe we followed by clicking here

Enjoy!

Alice x


Continue Reading...

02/04/2016

B - Baking


I always love trying out new recipes whether its something completely new such as the DIY Oreo Cookies I baked last year or whether its just a different take on a chocolate cupcake recipe. Back in February I visited My Cupcake Addiction - my go to place for new baking ideas and I found several different Cupcake recipes (which isn't hard on a baking blog) and I soon whittled it down to my favourite recipe - which I new wouldn't be too complicated and that we had most of the ingredients for (I did put my own spin on parts of the american recipe as we don't have things such as candy canes unless its Christmas)

The Hot Chocolate Cupcakes With Marshmallow Buttercream:

The cupcakes took me about 30 minutes to prepare and 18-20 minutes to bake. The ingredients make around 26-28 cupcakes - obviously depending on how much mixture you use in each cupcake case. The ingredients were originally measured in Cups but I've converted them into grams as its more a common measurement in the UK.

Ingredients:

Cupcakes:

280g of Plain Flour
450g of Caster Sugar
62g of Cocoa Powder
½ teaspoon salt
2 teaspoon Bicarbonate of Soda
1 teaspoon Baking Powder
1 teaspoon Vanilla Extract
2 Eggs
225ml (1 Cup) of Milk
225ml (1 Cup) of Hot Water
225ml (1 Cup) of Vegetable Oil

Buttercream:

168g Unsalted butter, softened
1 container (198g/7oz) Marshmallow Fluff
140g of Icing Sugar
1 teaspoon of Vanilla Extract

Toppings and Decorations:

Mini Marshmallows
Chocolate Chips

Method:

Cupcakes:

1) Preheat the oven to 240 degrees. Line at least two muffin tins with Cupcake Cases and set them both aside. 
2) Using a large bowl, combine all your dry ingredients which includes the flour, sugar, cocoa powder, salt, bicarbonate of soda and baking powder. Ensure you mix well.
3) Add in the vanilla extract, eggs, milk and vegetable oil and whisk together until the mixture is smooth. Pour in the hot water and whisk the mixture again. The batter will be very thing. 
4) Tip the batter from the bowl into a measuring jug to pour into the cupcake cases. Ensure each case is about 3/4 full in order to leave room for the cakes to rise. 
5) Bake in the preheated oven for around 18-20 minutes and allow to cool before decorating. 

Buttercream: 

For the icing if you aren't including the marshmallow fluff you can either follow the instructions on the back of the icing sugar box or you can follow this recipe but adjust it to the ingredients you are using. 

1) Whisk the softened butter with an electric mixer until its smooth and creamy
2) Add in marshmallow creme and beat the mixture until the two ingredients are fully combined. 
3) Add in the vanilla extract and then sift in the icing sugar - then whisk the mixture until it's smooth. 

Toppings and Decorations:
 
1) Once you've topped the cupcakes with frosting, sprinkle the mini marshmallows and chocolate chips over each individual cupcake - ensuring you use a generous amount of each. 

I love this recipe because you can adjust the decorations to the things you like or the ingredients you have in your household - If you don't like marshmallows perhaps use silver balls or chocolate flakes? 

"Sometimes you just need to eat a cupcake with lots of icing and get over it" 

Enjoy! 

Alice x 
Continue Reading...

22/09/2015

DIY Oreo Cookies

So a couple of months ago me and my sister decided to do some baking. I wanted to create something a little bit different from the normal 'chocolate cupcake' and having recently come across My Cupcake Addiction via a shared post on facebook, I decided to browse through her easy-to-make and unique cake ideas. One recipe that had previously caught my eye was the DIY Oreo Cookies, I thought these looked pretty cool, and the ingredients consisted of things that you would typically have in your household, meaning I didn't have to make a special trip to tescos to collect the items I would need.

We followed both the youtube video and the blog post that had been created by Elise, as this made it easier for us to ensure we were following the correct steps and mixing the ingredients in the right order (however the second time we made these we only followed the blog post - use whichever you find easier - i'll leave both links below).

The cookies did take a good 3 hours to make - but this included making, refrigerating, cutting and cooking the cookie dough as well as making the icing and then scooping it onto the cooked and cooled chocolate cookies - however, you do need to ensure you have enough time to make these cookies and relax afterwards (as being on your feet for that length of time, kills!). I'd advise using a free day you have, so you can take your time making them and you don't have to rush as the odd couple of hours in a day probably won't be enough. 

The time length to make these may seem extreme, but it was definitely worth the time. The creamy icing and chocolate cookie weigh each other out to create a (and i'm not exaggerating) heavenly taste and texture in your mouth. The recipe provided on My cupcake addiction creates around 22-24 Oreo cookies, which is plenty for you and your family to enjoy (obviously if you're planning on selling them at a cake stall etc. maybe double the batch). 

I've now created these cookies twice, the first time was a tester and for my family to enjoy and the second time was for my 18th birthday party which I wrote about in my previous blog post. At my party these were really popular, by the end of the night we only had 5 or 6 cookies left and those were the ones we had kept aside - so it seems everyone enjoyed them. They do not taste like your typical Oreo cookie you buy from the shop - they're completely different - but I have to say, they're probably tastier! In the future I am definitely going check out and try to create more of Elise's original cakes, cookies and desserts!

"Laughter is brightest, where food is best" 

You can find the My Cupcake Addiction DIY Oreo Cookies blog post here and the DIY Oreo Cookies vlog here

Disclaimer: This is not my recipe, Elise shared this recipe on her blog and youtube, however all thoughts and opinions are my own. 

Until next time,

Alice x


Continue Reading...